Wednesday 25 September 2013

New installer for KwaMoja

The final bit of the new +KwaMoja version is now complete and just needs testing. This is the brand new installer. 

Firstly it should be said that this builds on the excellent work of +Exson Qu and +iced lava. After downloading +KwaMoja and placing the code in the web root, point your browser to the code.

You should be taken automatically to the installer screen.

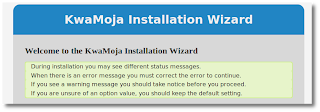
This is the wizard that will guide you through the entire installation process.

The first selection you must make is the language that you want to use for the installation, and for the admin user.
 
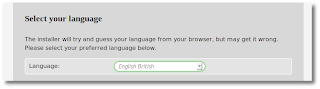
Changing this language setting will immediately refresh the screen, and you should now see it in your chosen language.


This language setting will remain constant through the rest of the installation process.

NB You must have the correct language setup on your server.

The final step on this first page is to choose the database management system that you want to use in +KwaMoja

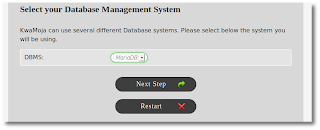
Currently only MariaDB, MySQL, and MySQLi are supported, although +Fahad Hatib has nearly completed his work to have PostgreSQL  supported in +KwaMoja. However it was decided to leave this till after this release to give maximum testing time for his work. Clicking on "Next Step" takes you to the second screen of the installer.


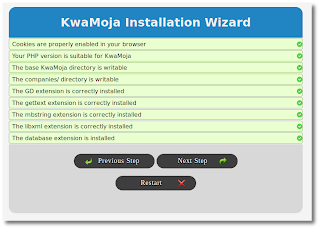
This screen will make all the necessary checks on your system to ensure that
+KwaMoja can be installed and run on your server.

If you get any failures here then you will be presented with a button to "Check Again". Just correct the problem and then click this button, until all problems are resolved, and you get a screen like the one on the right. Then move on to the next step.


This screen is for details of the database connection that we are going to use.

The first field is for the host machine that the database is on, relative to the web server, not to the client machine. So if the web server and the database server are on the same machine this can be left as "localhost". An IP address can also be used.

The last two fields are for the login details to your database. This shouldn't be confused with the login details to +KwaMoja. The second field is for the name of the database that you will use. This should only contains alphanumeric characters, and no spaces. If the database login that you supply doesn't have permissions to create a database (a lot of shared hosting companies do not allow this) then this database must be created manually before the installation process begins.


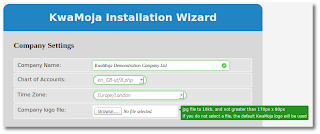
Clicking on "Next Step" takes us to the final screen of the installer. The first field is for the name of your company. This should be the full name that you want to appear on all paper work. Next we select a chart of accounts to be used for our company. Currently we have 27 charts kindly donated from all around the world - Many thanks to all those who have donated. Next is the timezone that the server is located in +KwaMoja should choose the correct for you. Finally you can upload your company logo which appears throughout +KwaMoja If you don't upload a logo the default +KwaMoja logo will be used instead.

Next we have the option to install some random test data.
Choose this if you are just evaluating +KwaMoja otherwise leave this unchecked.
Finally you need to enter the details for the +KwaMoja system administrator account. Default is a userid of admin, and a password of "kwamoja", but you can decide your own.

Once done click on the install button, and the installation process will start.

This will firstly create a config.php file based on the settings you give. Then create a database for you (this process is quite slow as it performs many checks along the way to ensure the database is correct). Finally if you have elected to load the random demonstration data, this will then be loaded.

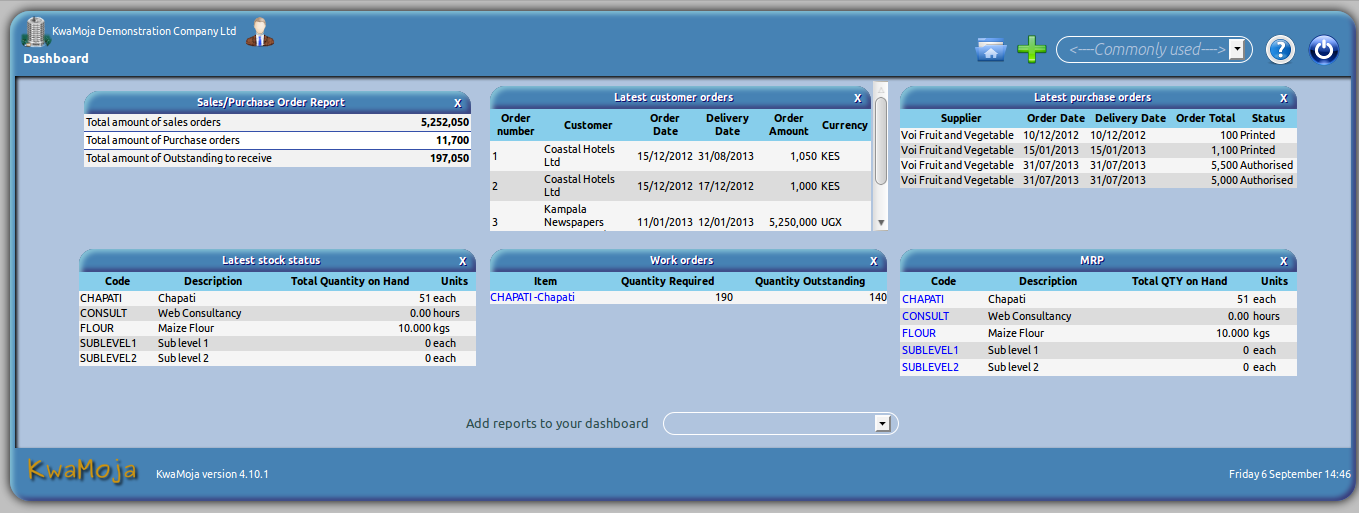
Once this is done, a button will be shown to start +KwaMoja. You will need to login using the system administrator login that you provided.

Once logged in, you will be taken to some of the configuration screens to setup your +KwaMoja. It is important you read these screens properly, and give the correct information. If in doubt consult the manual.

You can download this version of +KwaMoja for free from here

All feedback is appreciated. Please log any issues you find here.

Wednesday 18 September 2013

The importance of free and open discussion in projects

This page is written in response to the lies that +Phil Daintree has written about me, and spread on the internet. Despite years of searching he has been unable to find anything I have written that is untrue, and he has had to resort to vague generalities, faked emails, and badly fabricated screenshots (you can see the joins if you zoom in using any bit mapped image editor). +Phil Daintree  is welcome to make any comments to these pages, as he has done in the past. If I agree with what he says I will amend my writings, if I do not agree I have allowed his comments to stand next to mine so that people can make their own judgements. I have every confidence in the intelligence of readers to make a sensible judgement based on the facts. +Phil Daintree will not allow me the right of reply to any of the lies he has told about me. It seems to me significant that he realises that if people see both sides of the argument they will see through his lies.

+Phil Daintree has frequently said on webERP that when he gives his opinion on a subject then nobody is allowed to contradict his opinion and no more discussion on the subject should happen. People who ignore this and express different opinions on any subject find themselves banned from any future discussions.

This is fine as long as the decision that +Phil Daintree has come up with is correct, and that no better solution can ever exist. However when the decision is wrong then the repercussions can be very damaging.

For instance recently +Phil Daintree decided to use regular expressions to filter input into forms. This is a good idea in theory, but needs careful thought and planning, as the implications for non English characters are huge. As Phil had announced this decision as his, then no discussion was allowed.

We now have a webERP system (versions 4.11 and 4.11.1) which is totally unusable to anybody not using the standard 26 English alphabet characters. Not only this, but many of the other bugs already found in 4.11.1 and many of the others that await discovery could have been avoided by allowing free and open discussions.

This is a mistake that we intend to avoid in +KwaMoja. Anybody is allowed to contribute anything to any discussion. Even arguments are good as they force both sides to think through their ideas carefully.

"The only people who are afraid to argue are those who know themselves to be wrong".

Friday 6 September 2013

Introducing the KwaMoja dashboard

+KwaMoja now has a customisable dashboard.


This code has been kindly donated to +KwaMoja by +Mythri Hegde of Netelity and adds considerably to the usability of +KwaMoja.

We can produce any number of small reports to show in the dashboard. +Mythri Hegde has already contributed nine, and they look like this:

Each of these mini reports has a security token assigned to it. The user can only add the report to their dashboard if they have that security token. See here for more details of security tokens.

All a user has to do to remove it from their dashboard is co click on the X in the top right hand corner of the report.

At the bottom of the dashboard is a selection box
Clicking on this drops down a list of all those reports that a user can add to their dashboard, as follows:
Choosing from here adds the report to the users dashboard. The screen shot above shows 6 reports, but the user can have any number of reports showing depending on what they want.

Many thanks to +Mythri Hegde for her hard work and for contributing the code back to the project.

See the dashboard in operation by going to the KwaMoja demo at http://www.kwamoja.com/demo

Tuesday 3 September 2013

KwaMoja as it is used in African hospitals

People always talk about the use of +KwaMoja  in manufacturing, and distribution businesses, but +KwaMoja  also plays a big part in the administration of several hospitals.

We have written some extensions to +KwaMoja  that enable it to link seamlessly with an open source health information system project Care2x. All the financial and inventory transactions are delegated to +KwaMoja , and Care2x deals with the clinical information side.

When a patient is admitted in Care2x, +KwaMoja  Care2x will send this information to +KwaMoja  and if the patient is not already setup as a customer they will be setup. The interface with Care2x uses customer branches to indicate who will be paying the bill. If the patient pays in cash then they will get a branch with a code of CASH setup. If they are an insurance customer then they get a branch with an identical code to the customer code for that insurance company.

When any transaction occurs in Care2x which affects the financial status of the hospital then that information is sent to +KwaMoja.

So, when as in this example the doctor prescribes drugs for a patient in Care2x the transaction will be sent to +KwaMoja.

The cashier, who uses +KwaMoja will search for this patient and will be shown a list of all unpaid transactions for that patient, as can be seen here.

Once the items are paid for then the cashier will give the patient a receipt, which they can then exchange for the drugs, or test, or whatever the item is for.

If the item is a physical item, such as drugs as in this case +KwaMoja will automatically deduct the amount from the stock held. +KwaMoja will also do all the double entry bookkeeping for this transaction behind the scenes.

At the end of the cashiers shift, they can produce a report of all monies that they have taken, which should tally with the physical amount of money they have. This is transferred both physically and within +KwaMoja to a central cash account.

Using +KwaMoja the hospital can gain greater efficiency. It can also gain greater security against fraud, and as +KwaMoja is web based if there are remote funders of the hospital, such as a western charity, or central government, they get greater visibility on how the hospital is performing. All this leads to better health care for the people, and +KwaMoja is playing a central part in this.

Sunday 25 August 2013

Using regex patterns for verifying input

We have recently been using HTML 5 and JavaScript to do form verification, as Fahad blogged about here

I have just added pattern matching to this for email and telephone number verification. Thanks to +Exson Qu  for the regex ju-ju. 

HTML5 allows form elements of type "tel" and "email". We want to add in a regular expression to each of these types to verify the element as it is typed. The regular expressions we have used are "[0-9 +s()]*" for the telephone numbers, and "^[_a-z0-9-]+(\.[_a-z0-9-]+)*@[a-z0-9-]+(\.[a-z0-9-]+)*(\.[a-z]{2,4})$" for email addresses. Neither of these are 100% as it is not possible to deal with every method in the world of writing telephone numbers, and every method of constructing emails addresses, however these will do a good job on most.

It is feasible to add html in the form:

<input type="tel" name="Telephone" pattern="[0-9 +s()]*" value="" />

However this would need to be done wherever there is a telephone or fax number to be entered into KwaMoja. Then if we decide to improve the regex we would need to go through all these entries again. This can get messy.

It would be better to do this via JavaScript. We have a function called initial() that gets called when the page has been loaded. This function iterates through all the form elements in the page that has just been loaded and appends the regex pattern any with a type "tel" or a type "email". Here is the function:

function initial() {
    var n = document.getElementsByTagName("input");
    for (i = 0; i < n.length; i++) {
        if (n[i].type == "tel") n[i].pattern = "[0-9 +s()]*";
        if (n[i].type == "email") n[i].pattern = "^[_a-z0-9-]+(\.[_a-z0-9-]+)*@[a-z0-9-]+(\.[a-z0-9-]+)*(\.[a-z]{2,4})$";
    }
}


We also use this function to assign other properties to form elements.

Saturday 17 August 2013

Warehouse management - Part 1

I have been giving a lot of thought recently to how we should implement warehouse management. Just using row/bay/bin is too restrictive. 

If we have a warehouse structured like this :


it will not fit well to a rigid system of warehouse management.
 

What I propose a system where we have just one table for areas that can contain stock items. The best name would be "Locations" but that has already been taken, so I will for the moment call them "Containers". All containers can have parent containers. The above warehouse now looks like this:

As you can see the warehouse now can be modeled as a tree diagram. Each container can be set as to whether it can contain items, or just act as a container for child containers.


Each container has details of its physical position in the warehouse, and it's size. Also properties as to what it can contain (refrigeration unit for instance). Whether the contents are liquid etc.


Starting to implement this is easy, as each warehouse can be defined as a container. We just need a new table to hold the container information.

Monday 5 August 2013

How to sort HTML tables in JavaScript

A short while ago I blogged that KwaMoja now has the facility to sort HTML tables in JavaScript. I have had numerous requests to explain more about how this is done, so here is a brief tutorial on achieving this.

The table has to be constructed in a specific way. The area of the table to be sorted has to contain one row of <th> cells followed by any number of <td> rows.

So the following HTML would be suitable:

<tr>
        <th>Header1</th>
        <th>Header2</th>
</tr>
<tr>
        <td>Data11</td>
        <td>Data12</td>
</tr>
<tr>
        <td>Data21</td>
        <td>Data22</td>
</tr>

which will look like this:


Header1 Header2
Data11 Data12
Data21 Data22

This area to be sorted must be completely contained within a pair of tags, for instance between a <table> and a </table>. If you require other things in the table, then I generally use a <tbody> and a </tbody> to surround the area to be sorted.

The JavaScript function starts with the following:


1 function SortSelect(selElem) {
2    table=selElem.parentNode.parentNode;
3    headerRow = table.rows[0];


The function is called by clicking on the <th></th> element of the column that we wish to sort by. Thus the parameter "selElem" will be that cell. The parent of that cell will be the row (<tr>) containing the header, and the parent of the row will be the element that contains the whole of the sortable table.

Thus line 2 will give us the entire table that we wish to sort. Line 3 assigns the first row of that table to the variable "headerRow"

4    columnText=selElem.innerHTML;
5    for (var j = 0, col; col = headerRow.cells[j]; j++) {
6        if (
headerRow.cells[j].innerHTML==columnText) {
7            columnNumber=j;

8    }

This section finds the column number that is to be sorted on. Line 4 finds the column header, and then lines 5 to 8 loop through the columns until the correct one is found.

09    var tmpArray = new Array();
10    for (var i = 1, row; row = table.rows[i]; i++) {
11        var rowArray = new Array();
12        for (var j = 0, col; col = row.cells[j]; j++) {
13            if (row.cells[j].tagName == 'TD' ) {
14                rowArray[j]=row.cells[j].innerHTML;
15            }
16        }
17        tmpArray[i]=rowArray;
18    }

 
This section gets the information from each cell, and feeds it into a JavaScript array object before sorting it. Line 9 creates the array object then we cycle through each row (starting at the second line, as the first contains the headings), creating an array object for each row, and finally line 17 adds that row array to the main array.

19    tmpArray.sort(
20        function(a,b) {
21                if (columnClass=="number") {
22                    return parseFloat(a[columnNumber])-parseFloat(b[columnNumber]);
23                } else if (columnClass=="date") {
24                    da=new Date(a[columnNumber]);
25                    db=new Date(b[columnNumber]);
26                    return da>db;
27                } else {
28                    return a[columnNumber].localeCompare(b[columnNumber])

29                }
30        }
31    );
 

This section performs a standard JavaScript 3d array sorting routine. It will sort by number, alphabetic, and date. Other sorting routines can be included as needed.

Finally we need to feed the sorted array back into the html table as here

32    for (var i = 0, row; row = table.rows[i+1]; i++) {
33        var rowArray = new Array();
34        rowArray=tmpArray[i];
35        for (var j = 0, col; col = row.cells[j]; j++) {
36            if (row.cells[j].tagName == 'TD' ) {
37                row.cells[j].innerHTML=rowArray[j];
38            }
39        }
40    }
 

and we have fully sorted the HTML table in 40 lines of JavaScript. I have added in some nice formatting, and cursors in, and get the following full function:

function SortSelect(selElem) {
    var tmpArray = new Array();
    th=document.getElementById("Theme").value;
    columnText=selElem.innerHTML;
    table=selElem.parentNode.parentNode;
    row = table.rows[0];
    for (var j = 0, col; col = row.cells[j]; j++) {
        if (row.cells[j].innerHTML==columnText) {
            columnNumber=j;
            s=getComputedStyle(row.cells[j], null);
            if (s.cursor=="s-resize") {
                row.cells[j].style.cursor="n-resize";
                row.cells[j].style.backgroundImage="url('css/"+th+"/images/descending.png')";
                row.cells[j].style.backgroundPosition="right center";
                row.cells[j].style.backgroundRepeat="no-repeat";
                row.cells[j].style.backgroundSize="12px";
                direction="a";
            } else {
                row.cells[j].style.cursor="s-resize";
                row.cells[j].style.backgroundImage="url('css/"+th+"/images/ascending.png')";
                row.cells[j].style.backgroundPosition="right center";
                row.cells[j].style.backgroundRepeat="no-repeat";
                row.cells[j].style.backgroundSize="12px";
                direction="d";
            }
        }
    }
    for (var i = 1, row; row = table.rows[i]; i++) {
        var rowArray = new Array();
        for (var j = 0, col; col = row.cells[j]; j++) {
            if (row.cells[j].tagName == 'TD' ) {
                rowArray[j]=row.cells[j].innerHTML;
                columnClass=row.cells[columnNumber].className;
            }
        }
        tmpArray[i]=rowArray;
    }
    tmpArray.sort(
        function(a,b) {
            if (direction=="a") {
                if (columnClass=="number") {
                    return parseFloat(a[columnNumber])-parseFloat(b[columnNumber]);
                } else if (columnClass=="date") {
                    da=new Date(a[columnNumber]);
                    db=new Date(b[columnNumber]);
                    return da>db;
                } else {
                    return a[columnNumber].localeCompare(b[columnNumber])
                }
            } else {
                if (columnClass=="number") {
                    return parseFloat(b[columnNumber])-parseFloat(a[columnNumber]);
                } else if (columnClass=="date") {
                    da=new Date(a[columnNumber]);
                    db=new Date(b[columnNumber]);
                    return da<=db;
                } else {
                    return b[columnNumber].localeCompare(a[columnNumber])
                }
            }
        }
    );
    for (var i = 0, row; row = table.rows[i+1]; i++) {
        var rowArray = new Array();
        rowArray=tmpArray[i];
        for (var j = 0, col; col = row.cells[j]; j++) {
            if (row.cells[j].tagName == 'TD' ) {
                row.cells[j].innerHTML=rowArray[j];
            }
        }
    }
    return;
}


This is called by including this inline onclick handler

 onclick="SortSelect(this)"

I hope this explanation is useful to some people.